More Examples of Bad Technical Support

A few years ago I wrote my Why I Won't Buy Another HP Computer blog, wherein I detailed several terrible support experiences that I had to endure with Hewlett Packard's technical support people. In order to show that not everyone has terrible technical support people, I recently wrote my Why I Will Buy Another Dell Computer blog, where I described a great experience that I had with Dell's technical support people. That being said, not everyone can be a good as Dell, so in this blog I will illustrate another bad support example - this time it's from Microsoft's Technical Support.

Here's the situation: I recently purchased a Dell 8700 computer, which came with Windows 8.1 installed. Since I run a full Windows domain on my home network, I would rather run the professional version of Windows 8.1 on my computers, so I purchased a Windows 8.1 Pro Pack from Microsoft in order to upgrade my system. The upgrade process is supposed to be painless; Microsoft sends you a little box with a product key that you use to perform the upgrade.

Well, at least that's the way that it should have worked, but I kept getting an error message when I tried to use the key. So after a few attempts I decided that it was time to contact Microsoft's Technical support to resolve the issue. I figured that it was probably some minor problem with the key, and it would be an easy issue to resolve. With that in mind, I browsed to http://support.microsoft.com and started a support chat session, which I have included in its entirety below:

Answer Desk online chat
Vince P: 5:12:37 PM Hi, thanks for visiting Answer Desk. I'm Vince P.
Welcome to Answer Desk, how may I help you?
You: 5:13:09 PM I just purchased a Windows 8.1 Pro Pack Product key from Microsoft for my Dell 8700 computer, but I get an error message that the key does not work.
Here is the key: nnnnn-nnnnn-nnnnn-nnnnn-nnnn
Vince P: 5:13:43 PM I'll be happy to sort this out for you.
For documentation purposes, may I please have your phone number?
You: 5:14:02 PM nnn-nnn-nnnn
Vince P: 5:14:38 PM Thank you, give me a moment please.
As I understand, you cannot install Windows Media Center using the key that you have, is that correct?
You: 5:17:53 PM Yes, I am trying to upgrade from Windows 8.1 to Windows 8.1 Pro with Media Center
Vince P: 5:18:12 PM First, allow me to set expectations that Answer Desk is a paid support service. We have a couple of paid premium support options should your issue prove complex and require advanced resources. Before we discuss those further, I need to ask some questions to determine if your problem can be handled by our paid support or if it's something really easy that we can fix at no charge today.
I will remotely access your computer to check the root cause of this issue.
[Note: Vince sends me a URL and code to initialize a remote session to my computer using a 3rd-party application.]
You: 5:19:40 PM Why is a remote session necessary?
Vince P: 5:21:19 PM Yes, I need to check the root cause of this issue.
Or I can send you some helpful links if you want.
You: 5:21:52 PM Or you can ask me to check anything for you
What do you need to check?
Vince P: 5:22:38 PM http://windows.microsoft.com/en-US/windows-8/feature-packs
If this link doesn't work, there might be some third party application that are blocking the upgrade.
It is much faster if I remotely access your computer, if it's okay with you.
You: 5:24:34 PM I have gone through the steps in that article, they did not work, which is why I contacted support
Vince P: 5:25:06 PM I need to remotely access your computer.
You: 5:25:11 PM The exact error message is "This key won't work. Check it and try again, or try a different key."
Vince P: 5:25:16 PM Please click on the link and enter the code.
You: 5:25:46 PM Or - you can tell me what I need to check for you and I will give you the answers you need.
Vince P: 5:26:51 PM http://answers.microsoft.com/en-us/windows/forum/windows_8-pictures/upgrade-to-windows-8-media-center/6060f338-900f-437f-a981-c2ae36ec0fd8?page=~pagenum~
I'm sorry, but I have not received a response from you in the last few minutes. If you're busy or pre-occupied, we can continue this chat session when you have more time. If I do not hear from you in the next minute, I will disconnect this session.
It was a real pleasure working with you today. For now, thank you for contacting Microsoft Answer Desk. Again, my name is Vince and you do have a wonderful day.
Your Answer Tech has ended your chat session. Thanks for visiting Answer Desk.

Unbeknownst to "Vince", I worked in Microsoft Technical Support for ten years, so I know the way that the system is supposed to work and how Microsoft's support engineers are supposed to behave. Vince was condescending and extremely uncooperative - he simply wanted to log into my machine, but no one gets to log into my computers except me. I know my way around my computer well enough to answer any questions that Vince might have had, but Vince didn't even try. What's more, when Vince sent me a long support thread to read, he took that as his opportunity to simply end the chat session a few moments later. Very bad behavior, dude.

Unfortunately, Microsoft's chat application crashed after the session had ended, so I wasn't able to provide negative feedback about my support experience, so this blog will have to suffice. If I had a way to contact Vince's boss, I would have no problem pointing out that Vince desperately needs remedial training in basic technical support behavior, and he shouldn't be allowed to work with customers until he's shown that he can talk a customer through a support scenario without a remote session. If he can't do that, then he shouldn't be in technical support.

By the way - just in case someone else runs into this issue - all that I had to do in order to resolve the issue was reboot my computer. Seriously. Despite the error message, apparently Windows had actually accepted the upgrade key, so when I rebooted the computer it upgraded my system to Windows 8.1 Professional. (Go figure.)

Upgrading a Baby Computer

I'd like to take a brief departure from my normal series of IIS-related blogs and talk about something very near and dear to the hearts of many geeks - ripping a computer apart and upgrading its various hardware components just because it's fun. ;-)

Several years ago I bought a Dell Inspiron Mini 1011 Laptop, which is a smallish netbook computer with a 10-inch screen. (Actually, I bought this as an alternate laptop for my wife to use when travelling, since she doesn't like to travel with her full-sized laptop.)  This computer eventually became a "coffee-table laptop" for our house, which houseguests use when they come to visit. Since the netbook computer is so small, our family has affectionately labeled it the "Baby Computer."

Recently my wife and I took a trip to Hawaii, for which I decided to leave my full-size laptop at home, and I brought the Baby Computer instead.  Since I had never needed to rely on the Baby Computer to do anything more than surf the web in the past, I hadn't realized how quickly it was starved for resources whenever I tried to edit photos or write code. (Yes - I actually write code while on vacation... writing code makes me happy.) The Baby Computer shipped with an underwhelming 1GB of RAM, which filled up quickly if I tried to do too many things at once, and it came with a 120GB 5400rpm hard drive. There's nothing that I could do about CPU speed, but as I slogged through the rest of my vacation using the Baby Computer, I resolved to research if the other hardware in this laptop could be expanded.
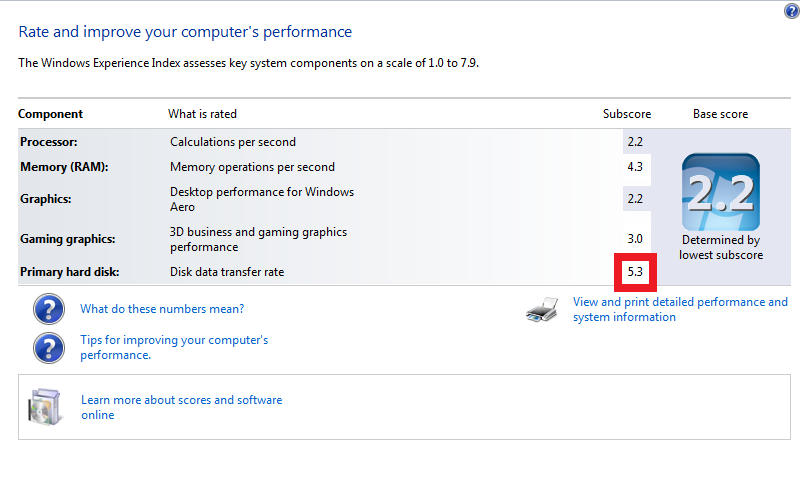
Figure 1 - Performance Before Upgrading

Once we got home from vacation I did some checking, and I discovered that I could expand the Baby Computer's RAM to 2GB, which isn't much, but it obviously doubled what I had been using, and I decided replace it's original hard drive with a 128GB solid-state drive (SSD). With that in mind, I thought that it would be a worthwhile endeavor to document the upgrade process for someone else who wants to do the same thing with their Dell Inspiron Mini 1011. (Of course, you are undoubtedly voiding your Dell warranty the moment that you open your laptop's case.)

First things first - Dell's support website has some great information about tearing apart your laptop; Dell provides a detailed online Service Manual with all of the requisite instructions for replacing most of the parts in the Dell Mini, and I used it as a guide while I performed my upgrades. That being said, the upgrade process was still a little tricky, and some of the parts were difficult to get to. (Although it seems like Dell may have made upgrades a little easier in later models of my laptop.)

So without further introduction, here are the steps for upgrading the RAM and hard drive in a Dell Inspiron Mini 1011 Laptop.

Step 1 - Remove the Screws from the Back of the Case

This step is pretty easy - there are only a handful of screws to remove.
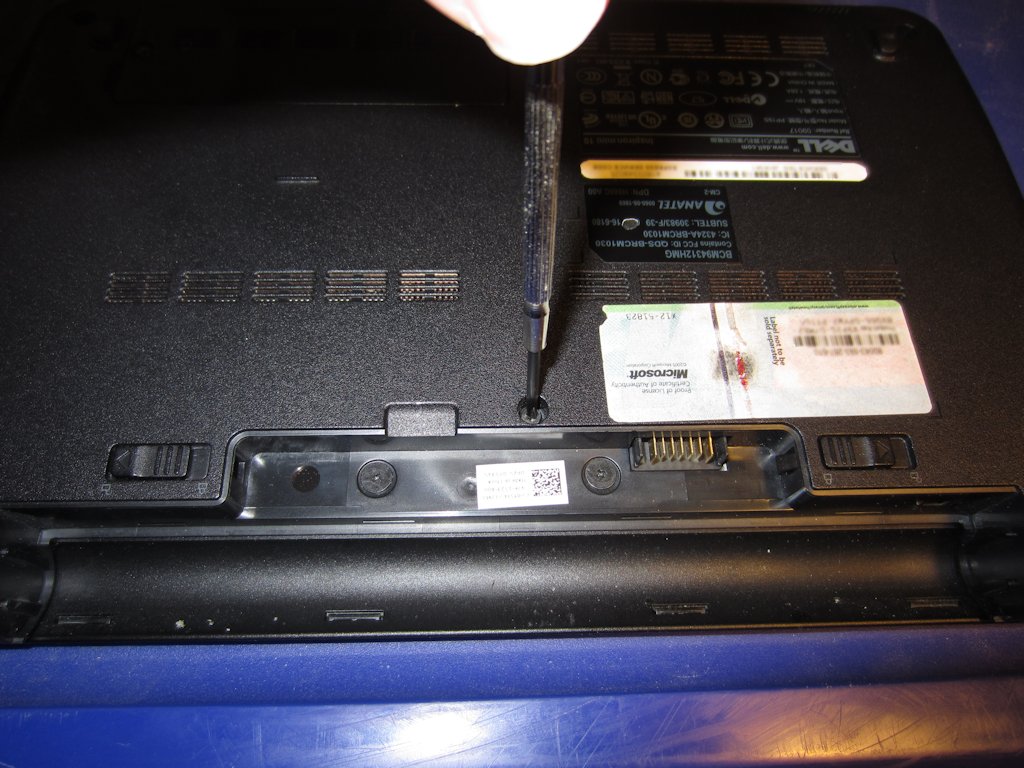
Figure 2 - Removing the Screws

Step 2 - Remove the Keyboard

It's pretty easy to pop the keyboard out of the case...
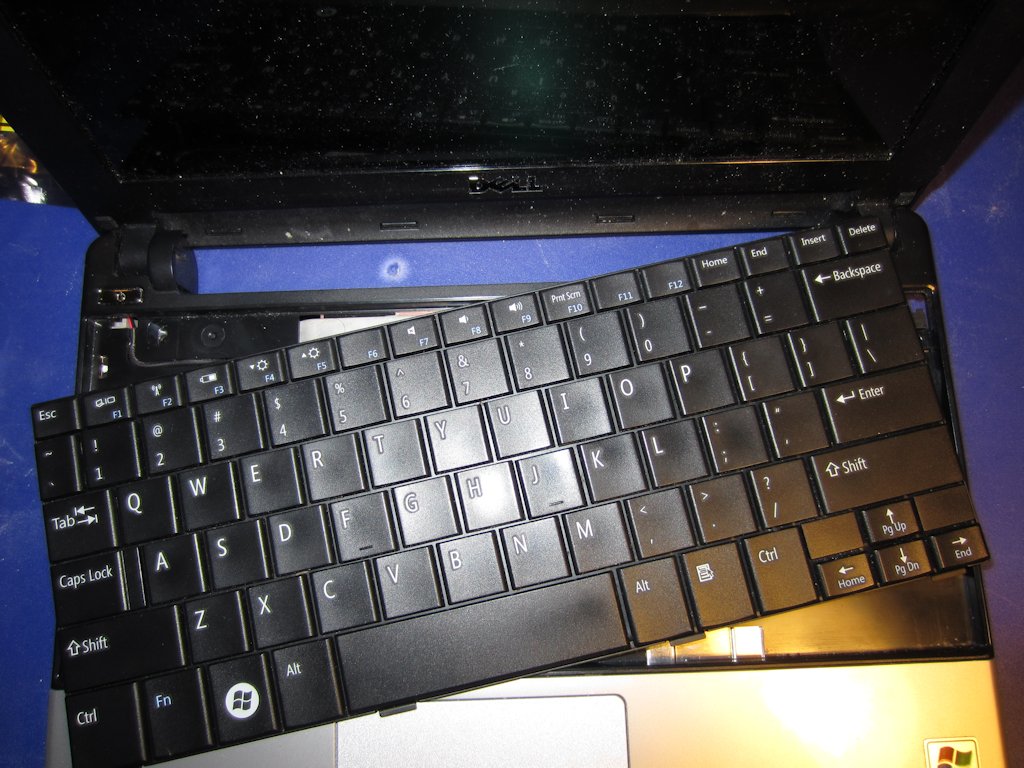
Figure 3 - Removing the Keyboard

...although once you have the keyboard loose, you need to flip it over carefully and remove the flat ribbon cable from underneath.
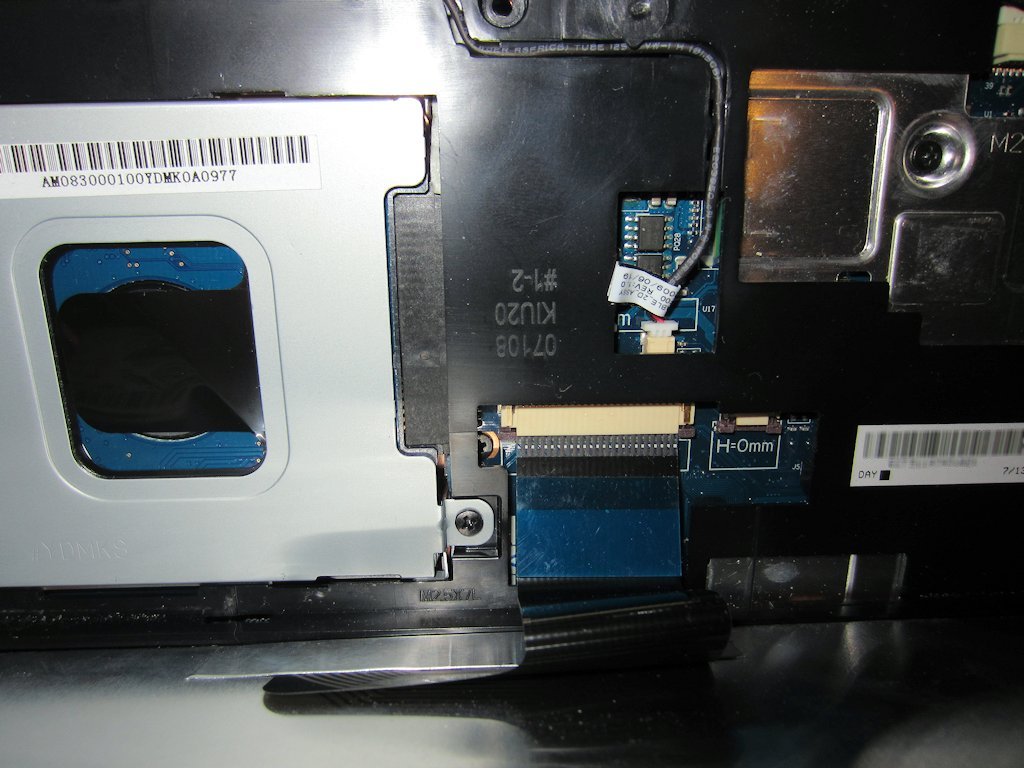
Figure 4 - Detaching the Keyboard Cable

Step 3 - Remove the Palm Rest

This step was a little tricky, and it took me a while to accomplish this task because I had to wedge a thin screwdriver in between the case and the palm rest in order to pry it off. Note that there is a flat ribbon cable that attaches the palm rest to the motherboard that you will need to remove.
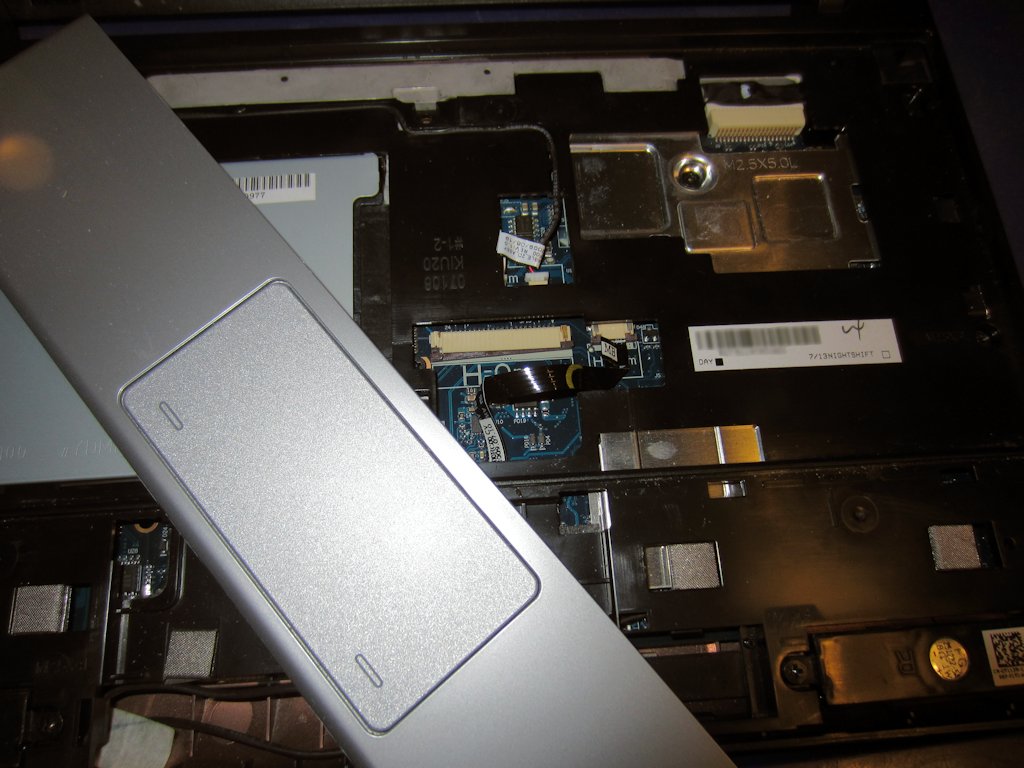
Figure 5 - Removing the Palm Rest

With the keyboard and palm rest out of the way, you can remove the hard drive - there's a single screw holding the hard drive mount into the case and four screws that hold the hard drive in its mount.
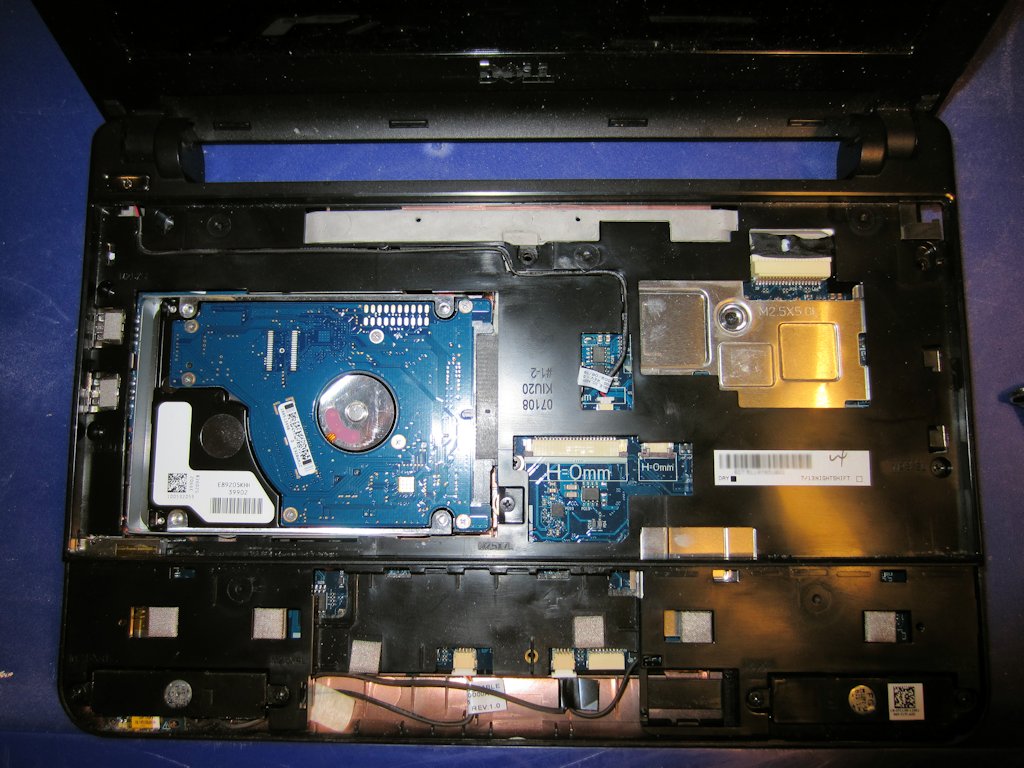
Figure 6 - Removing the Hard Drive

If you were only replacing the hard drive, you could stop here. Since I was upgrading the RAM, I needed to dig deeper.

Step 4 - Remove the Palm Rest Bracket and Motherboard

Once the hard drive is out of the way, you need to remove the motherboard so you can replace the RAM that is located underneath it. There are a handful of screws above and below the computer that hold the palm rest bracket to the case...
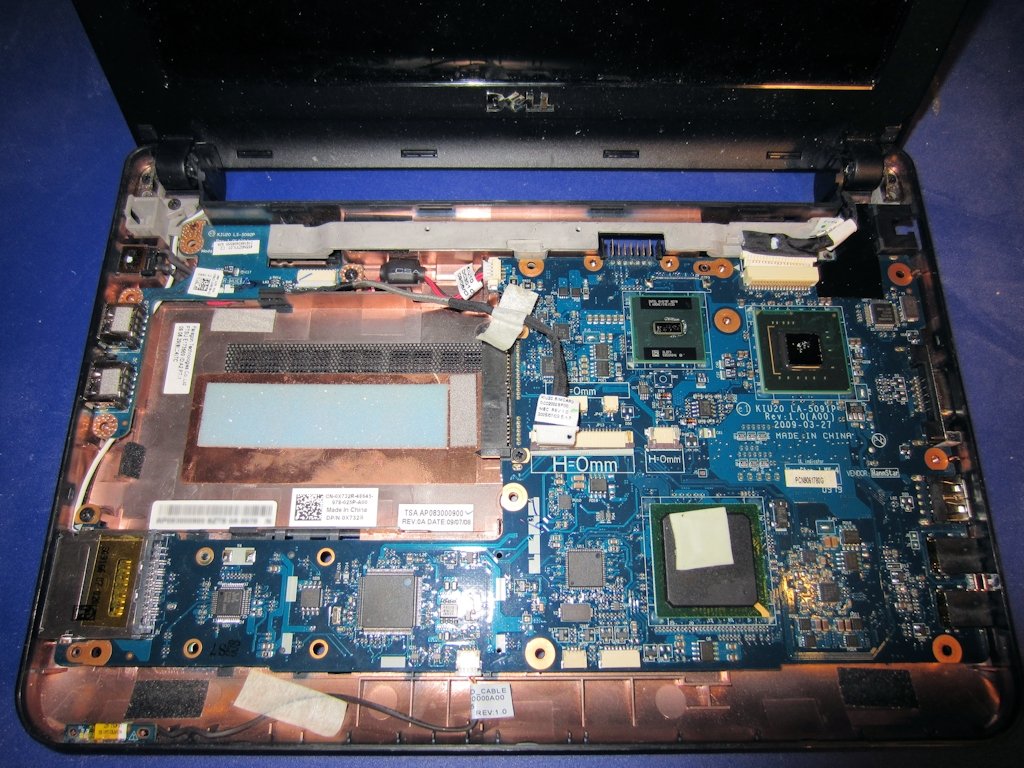
Figure 7 - After Removing the Palm Rest Bracket

...once you remove remove the palm rest bracket, you can flip over the motherboard and replace the RAM.
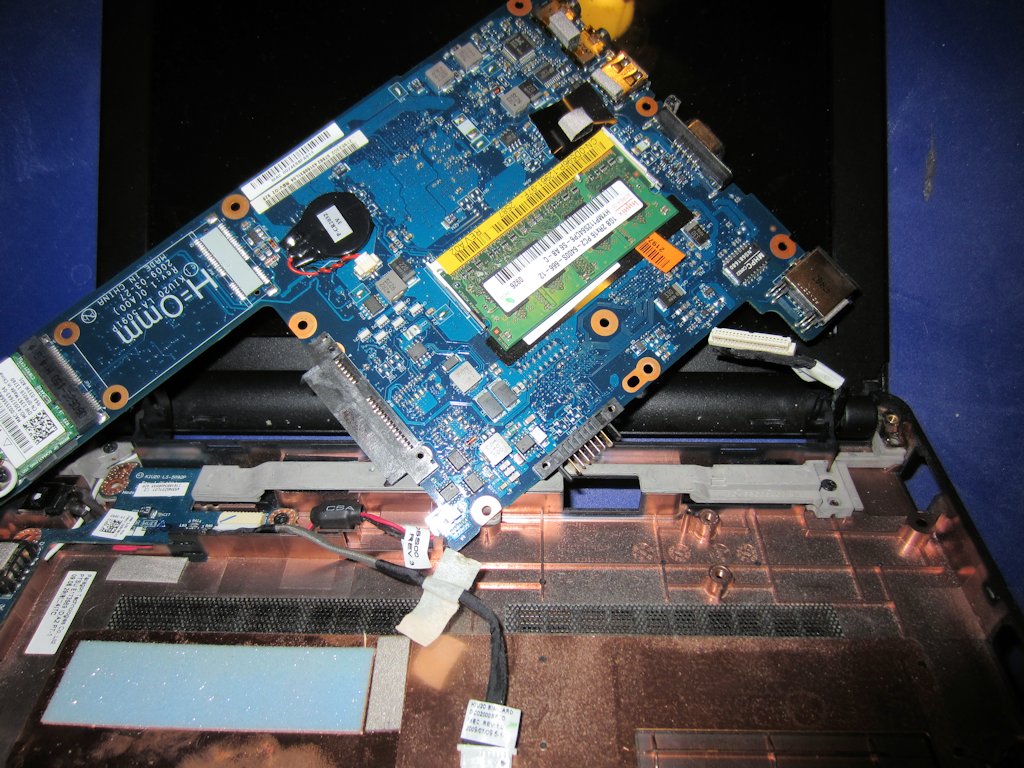
Figure 8 - Replacing the RAM

Optional Step - Cloning the Hard Drive

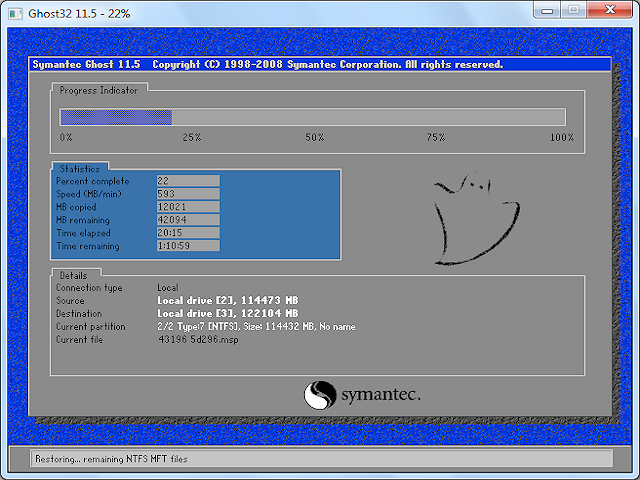
Rather than reinstalling the operating system from scratch, I cloned Windows from the original hard drive to the SSD. To do this, I placed both the old hard drive and the new SSD into USB-based SATA drive cradles and I used Symantec Ghost to clone the operating system from drive to drive.
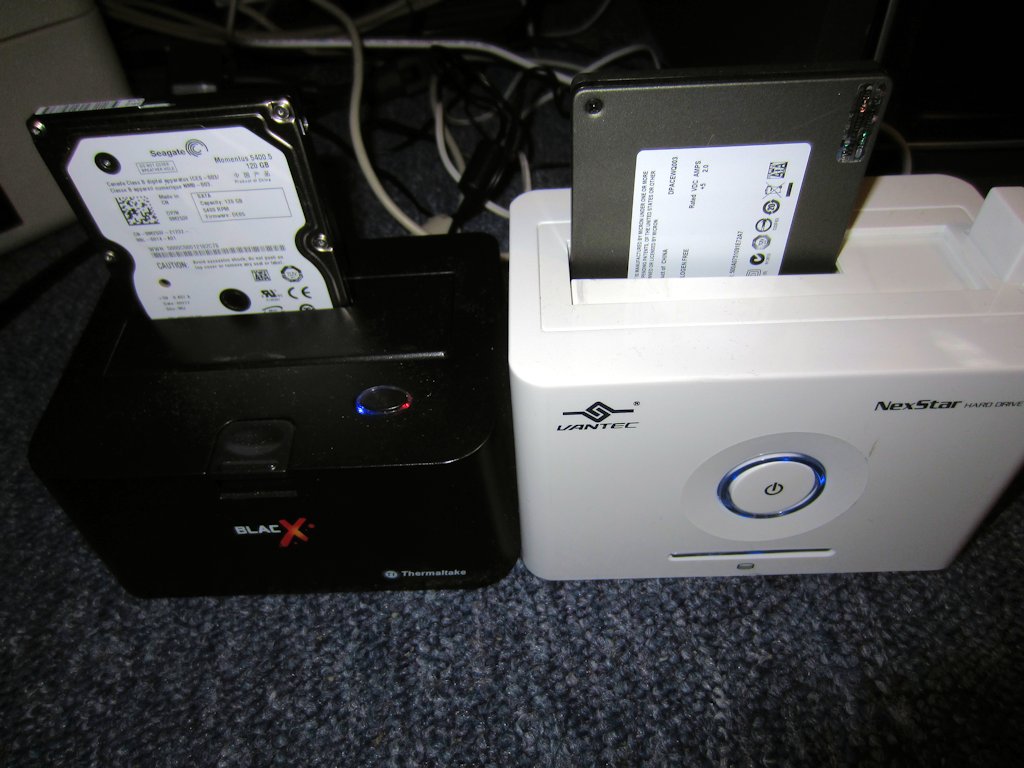
Figure 9 - Both Hard Drives in SATA Cradles
Figure 10 - Cloning the Hard Drive with Ghost

Once the clone was completed, all that was left was to install the new SSD and reassemble the computer.
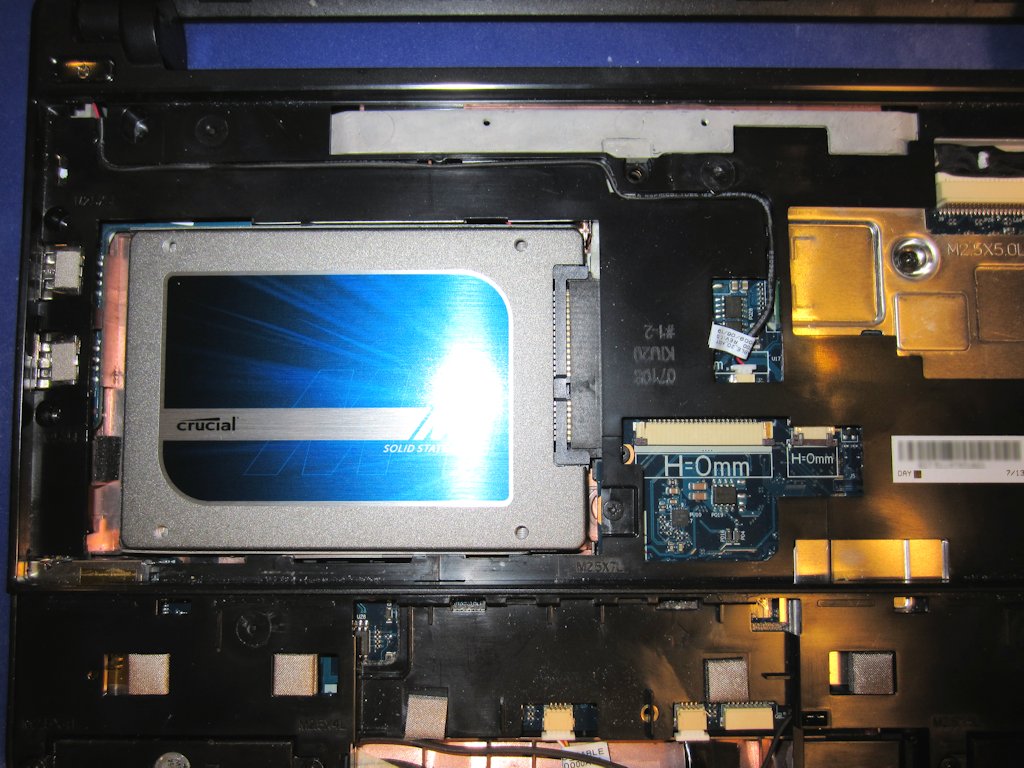
Figure 11 - Installing the New SSD

Summary

Once I had everything completed and reassembled, Windows booted considerably faster when using the SSD; it now boots in a matter of seconds. (I wish that I had timed the boot sequence before and after the upgrades, but I didn't think of that earlier... darn.) Running the Windows 7 performance assessment showed a measurable increase in hard drive speed, with little to no increase in RAM speed. Of course, since there was no speed increase for CPU or graphics, the overall performance score for my laptop remained the same. That being said, with twice the RAM as before, it should be paging to disk less often, so regular usage should seem a little faster; even when it does need to swap memory to disk it will be faster using the SSD than with its old hard drive.
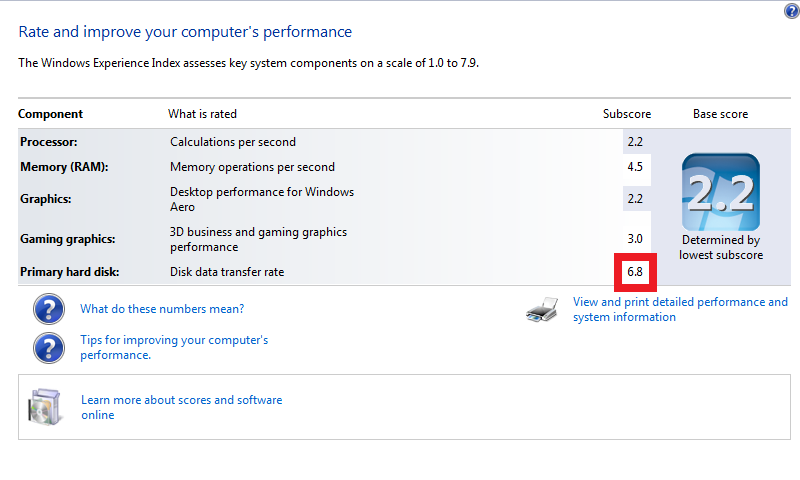
Figure 12 - Performance After Upgrading

That's all for now - have fun. ;-)


Note: This blog was originally posted at http://blogs.msdn.com/robert_mcmurray/