In Part 1 of this blog series about adding custom FTP providers with the IIS Configuration Editor, I showed you how to add a custom FTP provider with a custom setting for the provider that is stored in your IIS configuration settings. For my examples, I showed how to do this by using both the AppCmd.exe application from a command line and by using the IIS Configuration Editor. In part 2 of this blog series, I will show you how to use the IIS Configuration Editor to add custom FTP providers to your FTP sites.
As a brief review from Part 1, the following XML excerpt illustrates what the provider's settings should resemble when added to your IIS settings:
<system.ftpServer>
   <providerDefinitions>
     <add name="FtpXmlAuthorization"
       type="FtpXmlAuthorization, FtpXmlAuthorization, version=1.0.0.0, Culture=neutral, PublicKeyToken=426f62526f636b73" />
     <activation>
       <providerData name="FtpXmlAuthorization">
         <add key="xmlFileName"
           value="C:\inetpub\FtpUsers\Users.xml" />
       </providerData>
     </activation>
   </providerDefinitions>
 </system.ftpServer>
The above example shows the settings that are added globally to register an FTP provider. Note that this example only contains the settings for my custom provider; you would normally see the settings for the IisManagerAuth and AspNetAuth providers that ship with the FTP service in the providerDefinitions collection.
To actually use a provider for an FTP site, you would need to add the provider to the settings for the FTP site in your IIS settings. So for part 2 of this blog series, we will focus on how to add a custom provider to an FTP site by using the IIS Configuration Editor.
Having said all of that, the rest of this blog is broken down into the following sections:
Before continuing, I should reiterate that custom FTP providers fall into two categories: providers that are used for authentication and providers that are used for everything else. This distinction is important, because the settings are stored in different sections of your IIS settings. With that in mind, let's take a look at the settings for an example FTP site.
Step 1 - Looking at the configuration settings for custom FTP providers
The following example shows an FTP site with several custom FTP providers added:
<site name="ftp.contoso.com" id="2">
   <application path="/">
     <virtualDirectory path="/"
       physicalPath="c:\inetpub\www.contoso.com\wwwroot" />
   </application>
   <bindings>
     <binding protocol="ftp"
       bindingInformation="*:21:ftp.contoso.com" />
   </bindings>
   <ftpServer>
     <security>
       <ssl controlChannelPolicy="SslAllow"
         dataChannelPolicy="SslAllow" />
       <authentication>
         <customAuthentication>
           <providers>
             <add name="MyCustomFtpAuthenticationProvider" />
           </providers>
         </customAuthentication>
       </authentication>
     </security>
     <customFeatures>
       <providers>
         <add name="MyCustomFtpHomeDirectoryProvider" />
         <add name="MyCustomFtpLoggingProvider" />
       </providers>
     </customFeatures>
     <userIsolation mode="Custom" />
   </ftpServer>
 </site>
If you look at the above example, you will notice the following providers have been added:
- A custom FTP authentication provider named MyCustomFtpAuthenticationProvider has been added to the ftpServer/security/authentication/customAuthentication/providers collection; this provider will obviously be used by the FTP service to validate usernames and passwords.
- A custom FTP home directory provider named MyCustomFtpHomeDirectoryProvider has been added to the ftpServer/customFeatures/providers collection; this will be used by the FTP service for custom user isolation. Note the mode for the userIsolation element is set to custom.
- A custom FTP logging provider named MyCustomFtpLoggingProvider has been added to the ftpServer/customFeatures/providers collection; this will be used by the FTP service for creating custom log files.
As I mentioned earlier, you will notice that the settings for FTP custom providers are stored in different sections of the ftpServer collection depending on whether they are used for authentication or some other purpose.
Step 2 - Navigate to an FTP Site in the Configuration Editor
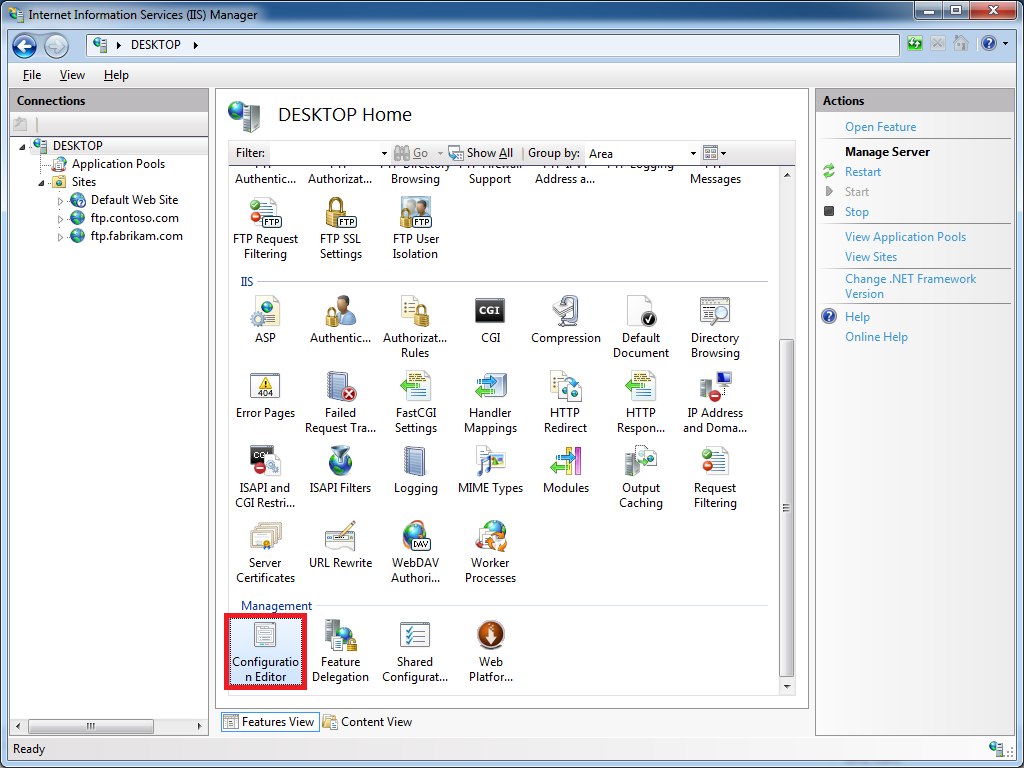
Open the IIS Manager and click on the Configuration Editor at feature the server level:
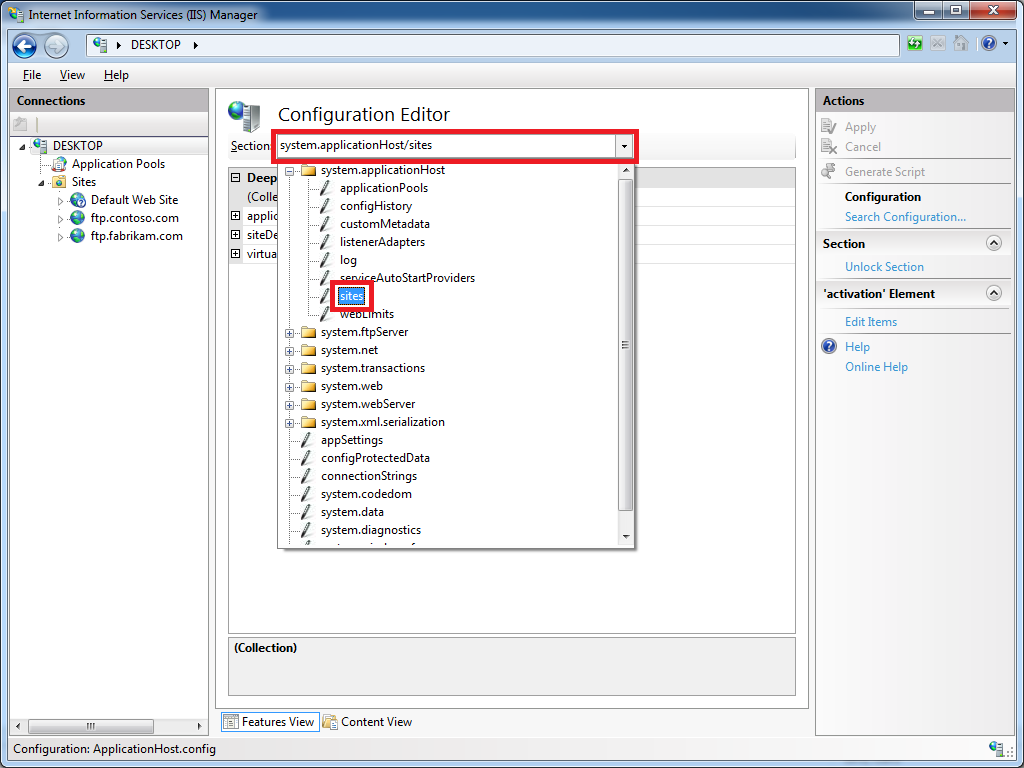
Click the Section drop-down menu, expand the the system.applicationHost collection, and then highlight the sites node:
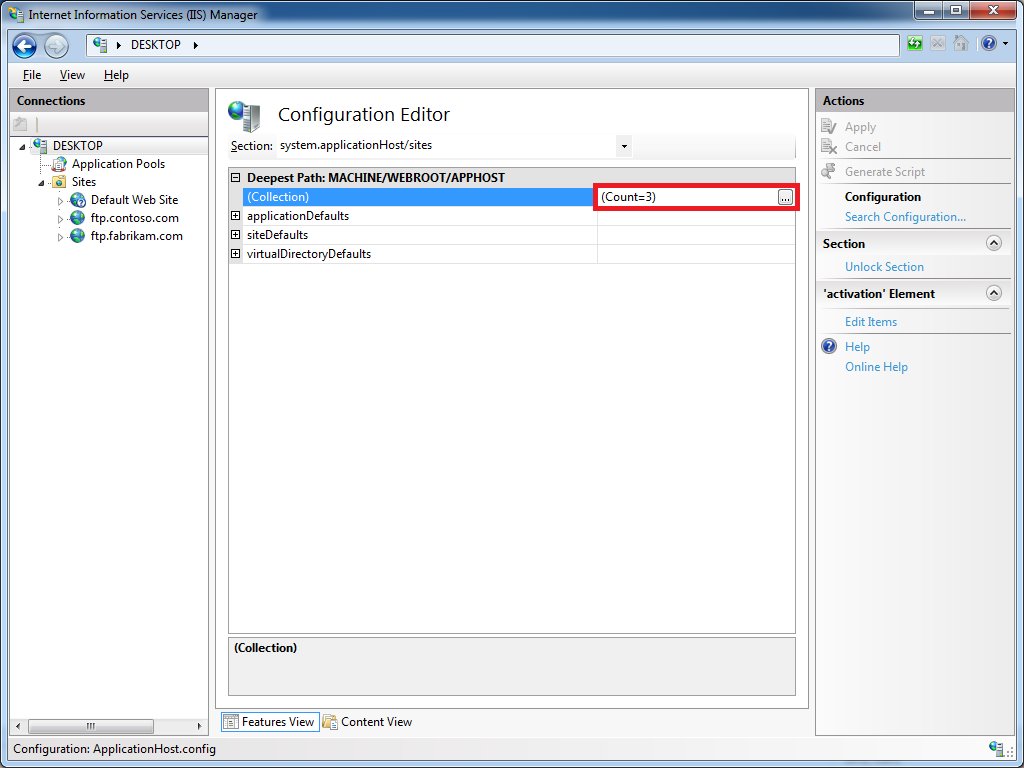
If you click on the Collection row, an ellipsis [...] will appear:
When you click the ellipsis [...], IIS will display the Collection Editor dialog box for your sites; both HTTP and FTP sites will be displayed:
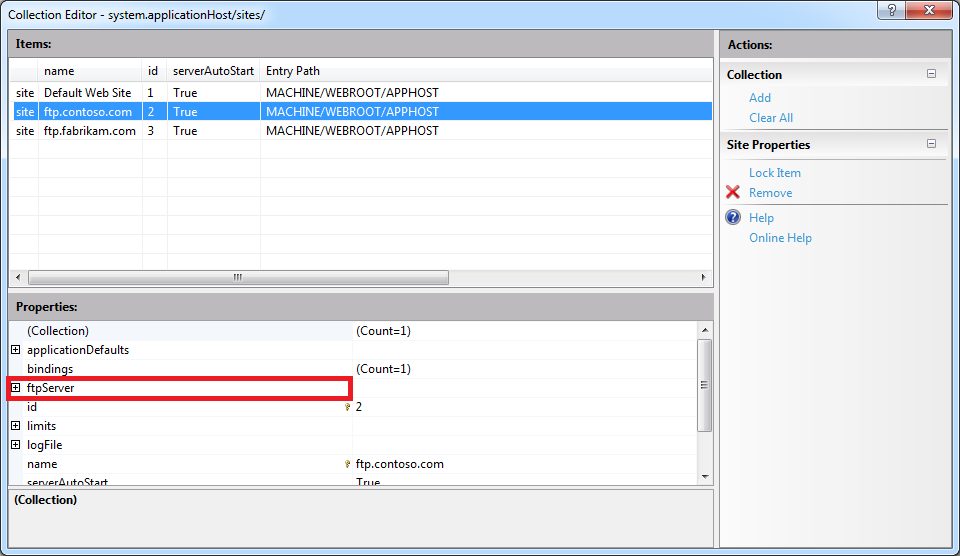
Expand the ftpServer node, which is where all of the site-level settings for an FTP site are kept.
Step 3 - Add custom FTP providers to an FTP site
As I mentioned earlier, custom FTP providers fall into two categories: providers that are used for authentication and everything else. Because of this distinction, the following steps show you how to add a provider to the correct section of your settings depending on the provider's purpose.
Add a custom FTP provider to an FTP site that is not used for authentication
Expand the customFeatures node, which is located under the ftpServer node for an FTP site; this collection defines the custom providers for an FTP site that are not used for authentication, for example: home directory providers, logging providers, etc. When you highlight the providers row, an ellipsis [...] will appear:
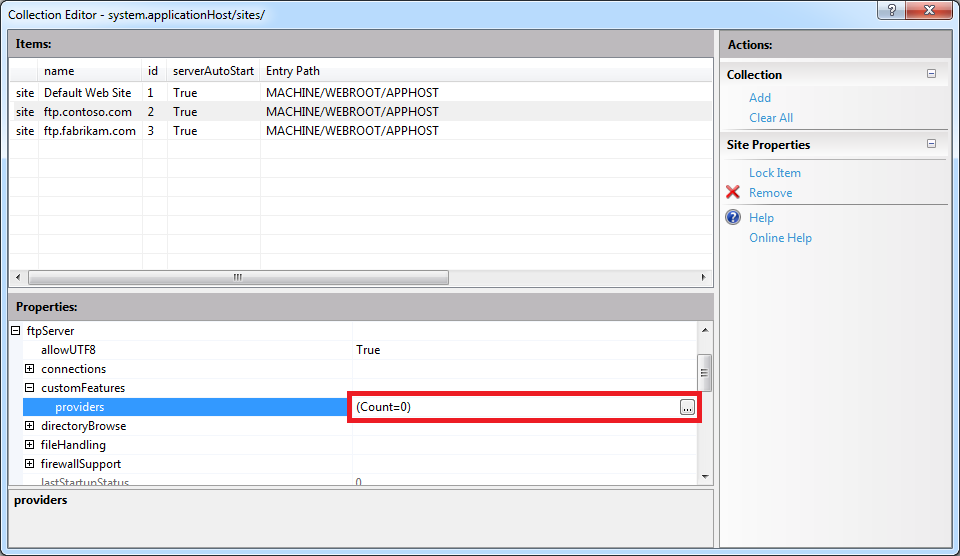
When you click the ellipsis [...], IIS will display the Collection Editor dialog box for your custom features (providers). When you click Add in the Actions pane, you need to enter the name of an FTP provider that you entered by following the instructions in Part 1 of this blog series:
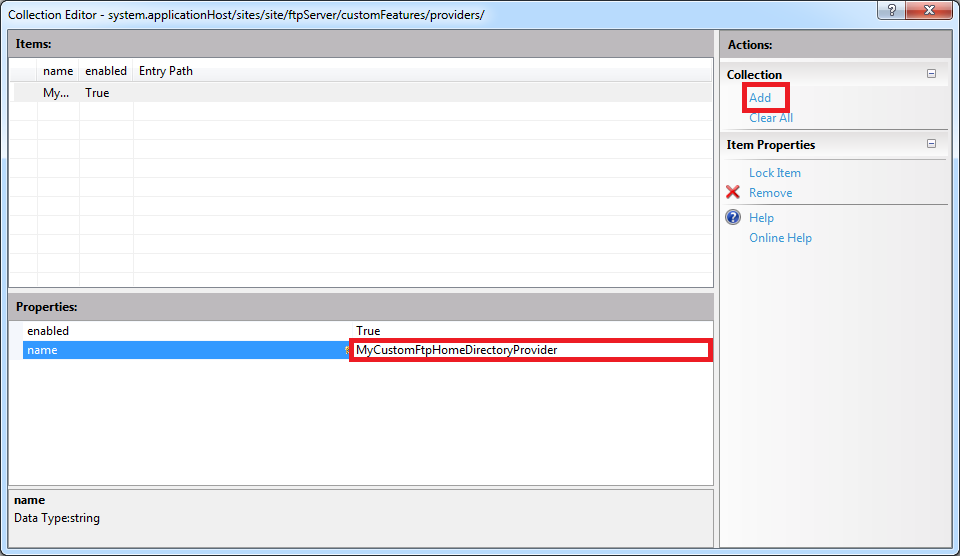
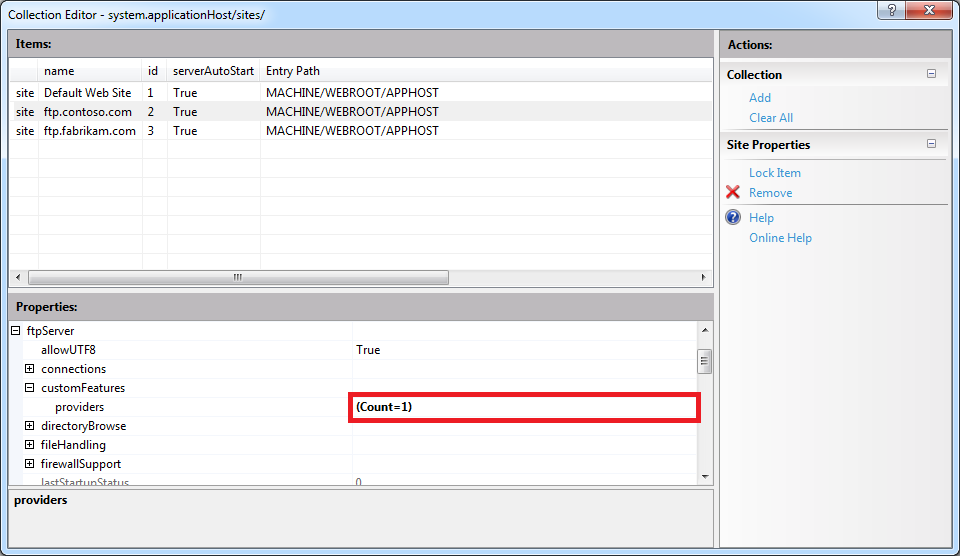
Once you enter the name of your FTP provider in the Collection Editor dialog box for your custom features, you can close that dialog box. The Collection Editor for your sites will reflect the updated provider count for your FTP site:
Important Note: If you are adding a custom FTP Home Directory Provider, you have to configure the mode for FTP's User Isolation features. To do so, you need to expand the userIsolation node, which is located under the ftpServer node for an FTP site. Once you have done so, click the mode drop-down menu and choose Custom from the list of choices:
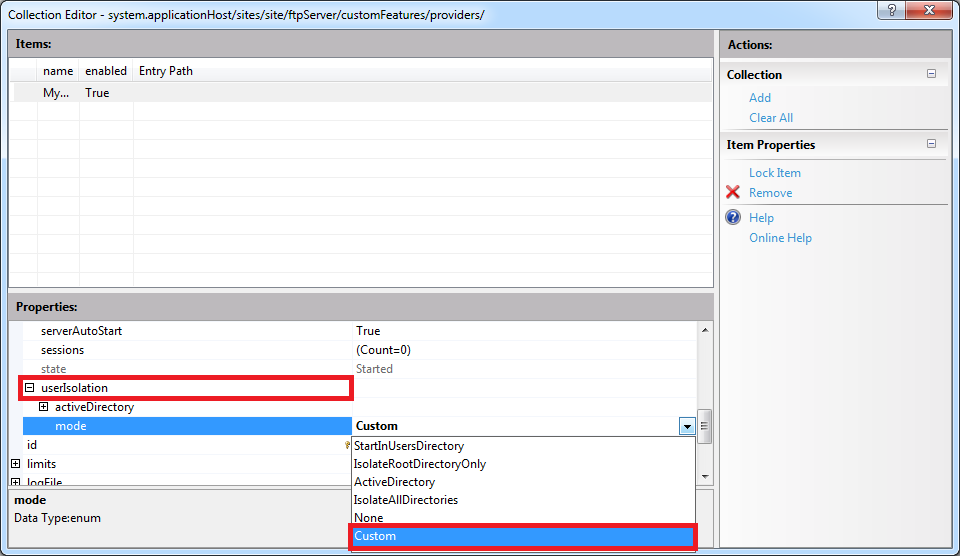
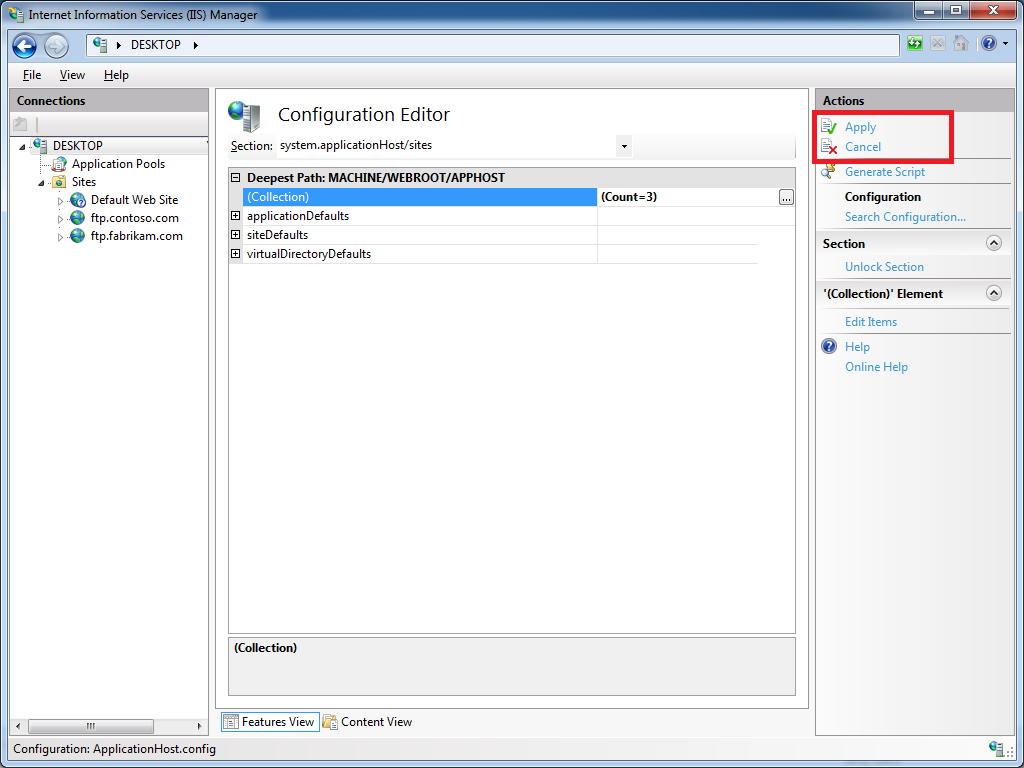
When you close the Collection Editor dialog box for your sites, you need to click Apply in the Actions pane to commit the changes to your IIS settings:
Add a custom FTP authentication provider to an FTP site
First and foremost - there is built-in support for adding custom authentication providers in IIS Manager; to see the steps to do so, see the FTP Custom Authentication <customAuthentication> article on the IIS.NET website. However, if you want to add a custom FTP authentication provider to an FTP site by using the IIS Configuration Editor, you can do so by using the following steps.
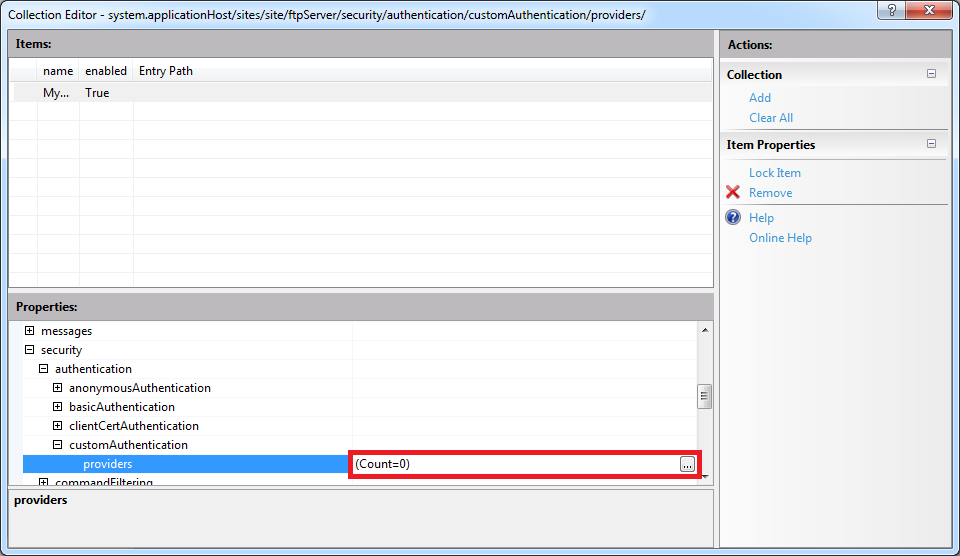
Expand the security node under the ftpServer node for an FTP site, then expand the authentication node, and then expand the customAuthentication node; this collection defines the custom authentication providers for an FTP site. When you highlight the providers row, an ellipsis [...] will appear:
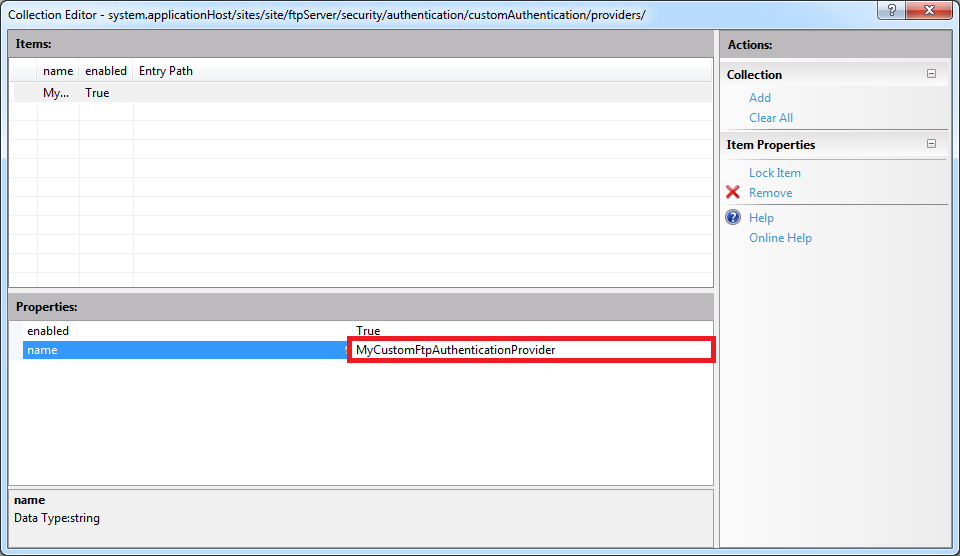
When you click the ellipsis [...], IIS will display the Collection Editor dialog box for your custom authentication providers. When you click Add in the Actions pane, you need to enter the name of an FTP authentication provider that you entered by following the instructions in Part 1 of this blog series:
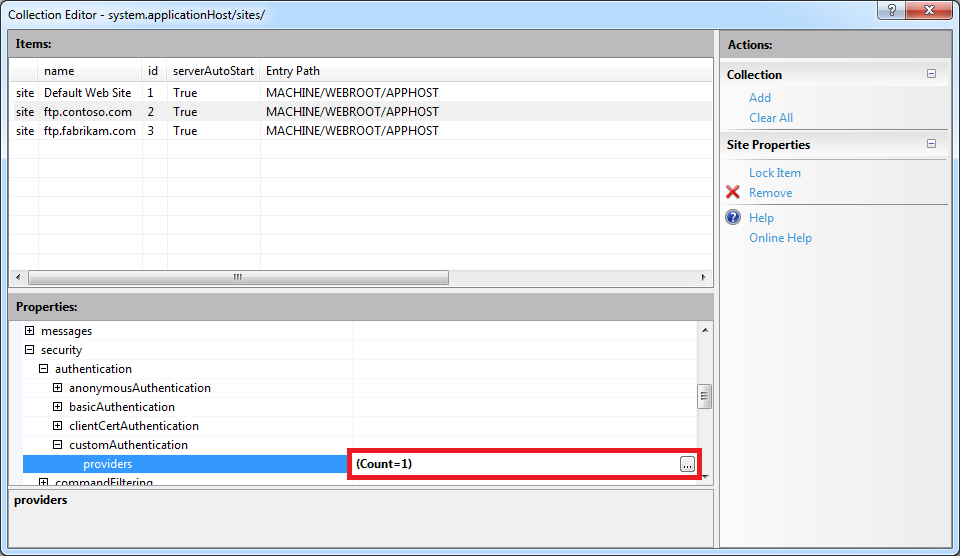
Once you enter the name of your FTP authentication provider in the Collection Editor dialog box for your custom authentication providers, you can close that dialog box. The Collection Editor for your sites will reflect the updated authentication provider count for your FTP site:
When you close the Collection Editor dialog box for your sites, you need to click Apply in the Actions pane to commit the changes to your IIS settings:

Summary and Parting Thoughts
As I mentioned in part 1 of this series, I admit that this might seem like a lot of steps to go through, but it's not that difficult once you understand how the configuration settings are organized and you get the hang of using the IIS Configuration Editor to add or modify these settings.
Disabling Custom User Isolation
In the Add a custom FTP provider to an FTP site that is not used for authentication section of this blog, I added a step to specify Custom as the User Isolation mode. Since this is something of an advanced feature, there is no user interface for enabling custom user isolation; this was a design decision to keep people from breaking their FTP sites. Here's why: if you enable custom user isolation and you don't install a custom Home Directory provider for FTP, all users will be denied access to your FTP site.
That being said, once you have enabled custom user isolation, the option to disable custom user isolation will "magically" appear in the FTP User Isolation feature in the IIS Manager. To see this for yourself, you would first need to follow the steps to custom user isolation in the Add a custom FTP provider to an FTP site that is not used for authentication section of this blog.
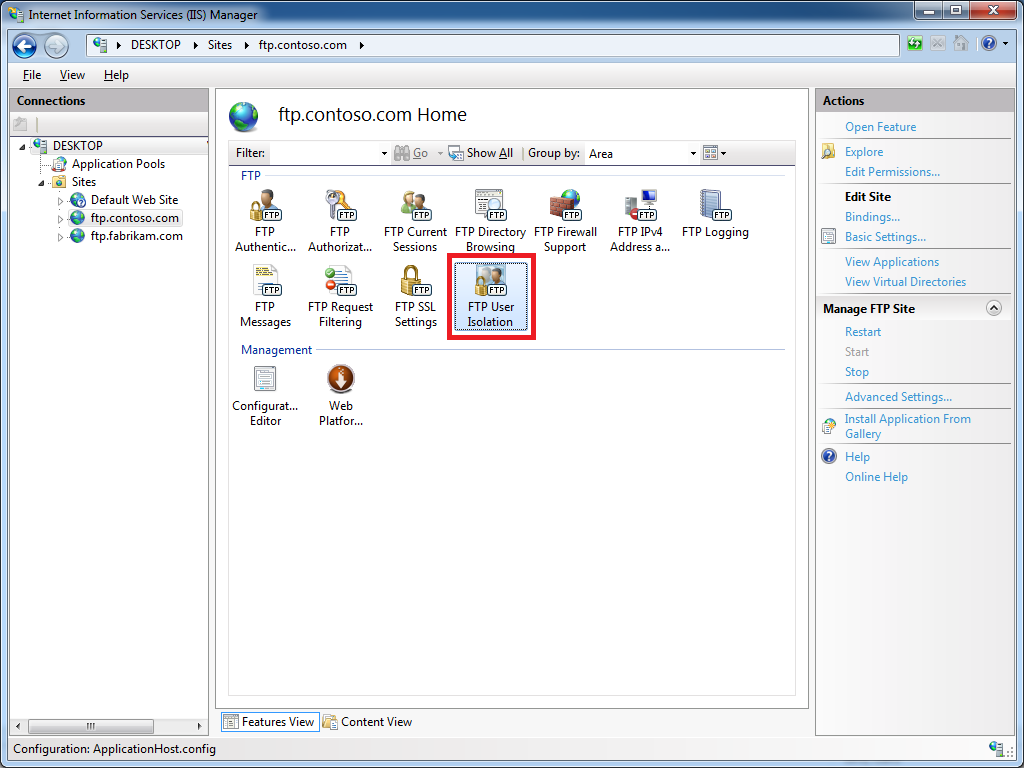
Once you have enabled custom user isolation, highlight your FTP site in the list of Sites pane of IIS Manager, then open the FTP User Isolation feature:
When you open the FTP User Isolation feature, you will see that an option for Custom now appears in the list of user isolation modes:
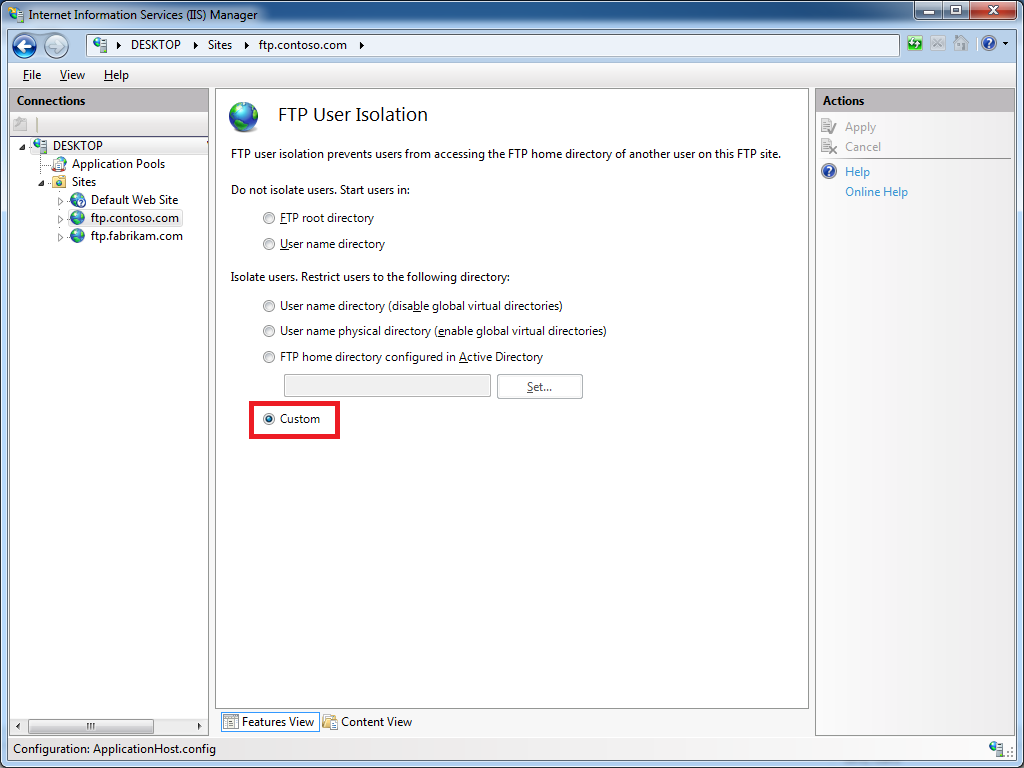
This option will appear as long as custom user isolation is enabled. If you change the user isolation mode to something other than Custom, this option will continue appear in the list of user isolation modes until you navigate somewhere else in IIS Manager. Once you have changed the user isolation mode to one of the built-in modes and you navigate somewhere else, the Custom option will not show up in the FTP User Isolation feature until you follow the steps to re-enable custom user isolation.
Additional Information
If you want additional information about configuring the settings for FTP providers, you can find detailed reference documentation at the following URLs:
Each of these articles contain "How-To" steps, detailed information about each of the configuration settings, and code samples for AppCmd.exe, C#/VB.NET, and JavaScript/VBScript.
As always, let me know if you have any questions. ;-]
Note: This blog was originally posted at http://blogs.msdn.com/robert_mcmurray/