Using the WebDAV Redirector with OneDrive Part 1 - Standard Security
30 September 2014 • by Bob • WebDAV, OneDrive, SkyDrive
If you have read some of my previous blog posts and IIS.NET articles about WebDAV, you will see that I often use the WebDAV Redirector that is built-in to Windows in order to connect to various WebDAV websites. This allows me to access my files via a mapped drive letter, which also enables me to use WebDAV with applications that do not have native WebDAV support. (Like Visual Studio.) I'm also a big fan of OneDrive, but sometimes I'm on a legacy system where I don't have OneDrive installed. With that in mind, I thought that I would put together a quick blog series to show you how to map a drive letter to your OneDrive files.
In Part 1 of this series, I will show you how to map a drive letter to your OneDrive account by using standard security. In Part 2 of this series, I will show you how to map a drive letter to your OneDrive account after you have enabled two-step verification for your account security.
Step 1 - Log Into Your OneDrive Account
The first thing that you need to do is to browse to 
Your Customer ID is the value that is specified after the "cid=" in the URL; for example: "https://onedrive.live.com/?cid=426f62526f636b73". You will need this value when you map a drive letter.
Step 3 - Map the Drive Letter
Your next step is to map the drive letter, and there are a few ways to do this. I have documented several methods in my Using the WebDAV Redirector article on the IIS.net website, but I will show a few ways in this blog.
Method #1 - Using the Windows User Interface and Wizards
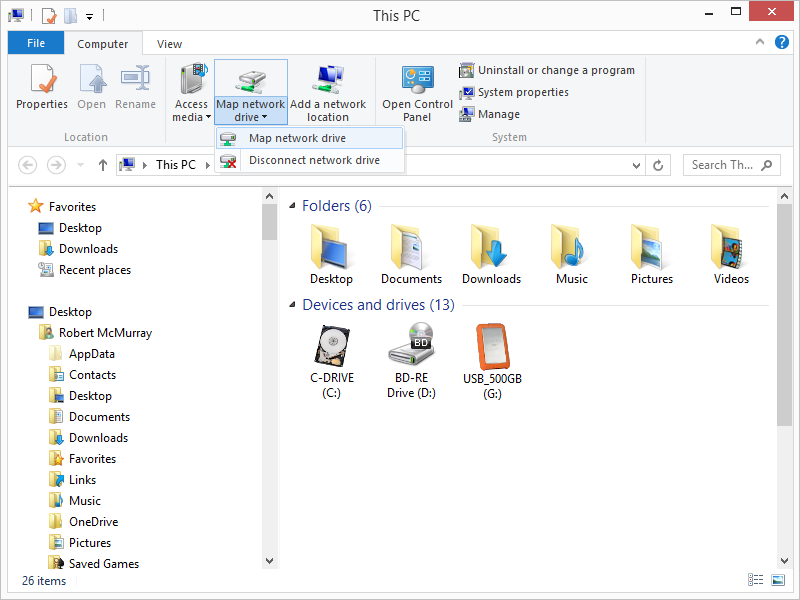
On most of my systems I have the Network and This PC or My Computer icons on my desktop, which makes it easy to simply right-click one of those icons and select Map network drive:

An alternate method on Windows 8 is to open This PC and Map network drive will be listed as an icon on the Windows Explorer ribbon:
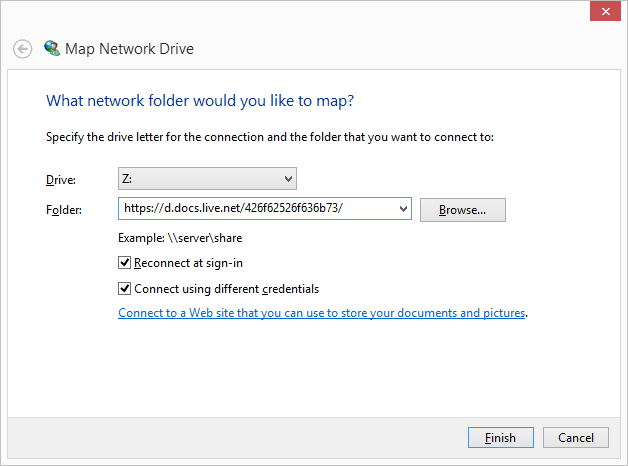
Once the Map Network Drive Wizard appears, enter "https://d.docs.live.net/" followed by your Customer ID from Step 2. For example: "https://d.docs.live.net/426f62526f636b73/"
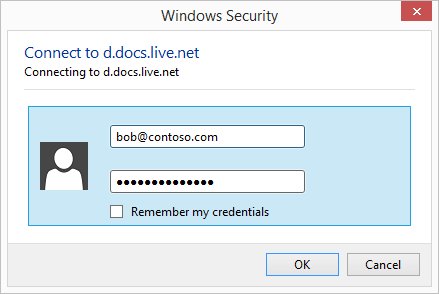
When the Windows Security dialog box appears, enter the email address and password that you used to log into your OneDrive account in Step 1.
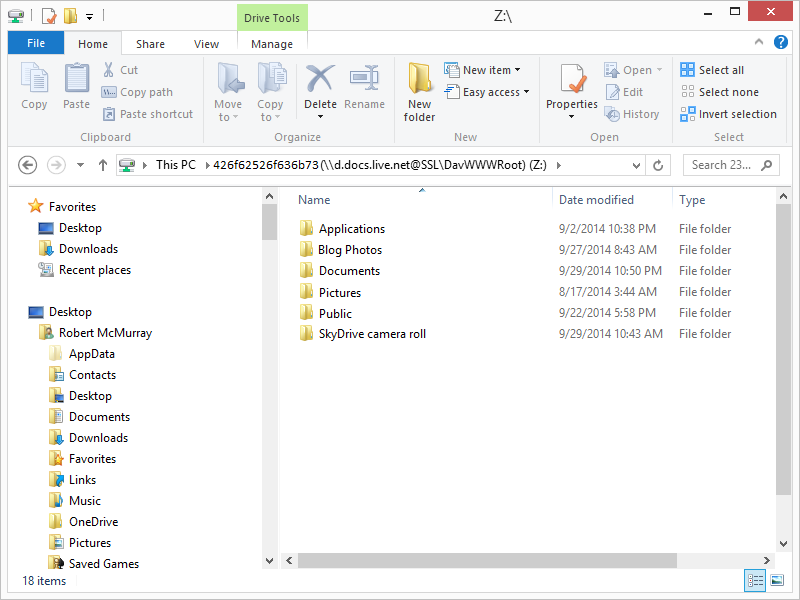
Once the mapping has been completed, you will be able to view your OneDrive files in Windows Explorer via the mapped drive:
Method #2 - Using the Windows Command Line
You can also map a WebDAV drive letter to your OneDrive account from a command line. The general syntax is listed below:
|
For example:
C:\>net use * https://d.docs.live.net/426f62526f636b73/ /user:"bob@contoso.com" "P@ssw0rd" C:\>dir Volume in drive Z has no label. Volume Serial Number is 0000-0000 Directory of Z:\ 09/02/2014 10:38 PM <DIR> Applications 09/27/2014 08:43 AM <DIR> Blog Photos 09/29/2014 10:50 PM <DIR> Documents 08/17/2014 03:44 AM <DIR> Pictures 09/22/2014 05:58 PM <DIR> Public 09/29/2014 10:43 AM <DIR> SkyDrive camera roll C:\> |
That wraps it up for Part 1 of this blog series. In Part 2, I will show how to map a WebDAV drive to your OneDrive account after you have enabled two-step verification for your account security.
Note: This blog was originally posted at http://blogs.msdn.com/robert_mcmurray/
Tags: WebDAV, Authentication, Security, OneDrive, SkyDrive