Modding Aviom Headphone Jacks
24 September 2020 • by Bob • Music, Technology
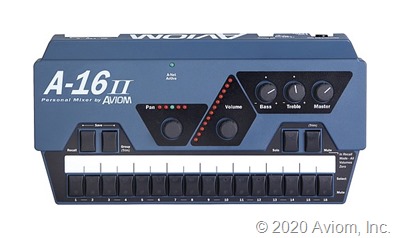
If you've played music in a live setting sometime within the past decade, chances are that you've used some sort of
Needless to say, these systems are great, and one of the
These Aviom systems work great, but they have one nagging design flaw that I hear about from everyone I know who has used them: the headphone jacks are soldered to the circuit boards, but they're not secured to the case with a nut. As a direct result, the headphone jacks eventually separate from the circuit boards, causing the mixers to lose signal to one or both ears. And this happens a lot.
Thankfully, there's an easy mod that you can perform on your Aviom systems to make up for this design flaw: you can remove the headphone jack from the circuit board, and replace it with a headphone jack that is mounted to the case. This is a pretty simple hack, and it usually takes me around 10 minutes per mixer to swap out the parts. With that in mind, you might want to modify all of your mixers at the same time. (Which is what I chose to do.)

MODIFICATION INSTRUCTIONS
To perform this modification, you'll need:
- A stereo panel mount jack to replace the old headphone jack
- A small spool of wire to connect the panel mount jack to the circuit board
- A small screwdriver to assist with removing buttons
- A soldering iron, some solder, and basic soldering skills
- OPTIONAL: Alligator clip wires for testing
- OPTIONAL: Electrical tape to insulate the circuit board
WARNING: This modification will probably void your warranty. But these personal mixers are old enough that yours probably aren't under warranty anyway. But still, you might want to check.
STEP 1 - Remove all of the knobs and buttons from the front panel. The knobs should pull right off, but sometimes I need to use a small screwdriver to pop off the buttons. (Note: keep track of which buttons came from where, because several of the buttons have different holes that let the LEDs shine through.)
STEP 2 - Remove the screws from the bottom panel, and I've highlighted all of their locations in the image below. The only tricky part about this step is that one of the screws is probably hidden under one of the labels, which is undoubtedly to prevent people from modifying their Avioms and voiding their warranty.
STEP 3 - Open the case and remove the circuit board. Once you have the circuit board removed, you can locate the headphone jack, which I have highlighted in the following image.
STEP 4 - Remove the headphone jack that is mounted to the circuit board. In every situation where I've replaced a headphone jack, I was able to simply pop them off the circuit board without doing any damage, which is probably because the continuous abuse of plugging and unplugging headphones has usually separated the headphone jack from the circuit board already, which is why this mod is necessary. However, if you try to remove the old headphone jack and it doesn't seem to want to move, you should desolder the old jack instead of forcing it.
STEP 5 - Solder wires onto the circuit border in the locations shown in the image below. Pay attention to where the ground, left, and right wires are soldered. As you can see in the image, I use alligator clip wires to test out my soldering before I solder the wires to the new stereo jack.
STEP 6 - Solder the new stereo jack to the wires, then test out the circuit before reassembling the mixer.
STEP 7 - Mount the new stereo jack to the case. While it may not be necessary, I usually place a piece of electrical tape on the circuit board where the jack will be located, and I do this to keep the new headphone jack from coming into contact with the circuit board.
STEP 8 - Secure the circuit board in the case, assemble the two halves of the case back together, and then replace all the screws, knobs, and buttons. (Make sure that you put the buttons back in the same locations where they were before the modification.)
That's all there is to it!
The first mod that you do might take a little bit longer as you get the hang of it, but once that's out of the way, any remaining mods should be quicker.
BONUS TIP:
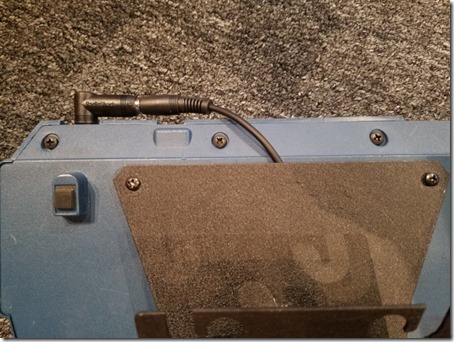
There is one extra step that you can take in order to improve the stability of your Aviom systems. If you're using the stand adapters that allow you mount your Aviom systems on microphone stands, there's an additional hack that I use which you might want to consider. I plug a right-angle headphone adapter into the Aviom's headphone jack, then I plug a six-foot headphone extension cable into the right-angle adapter, and then I secure the headphone extension cable between the Aviom mixer and the stand adapter so that it cannot be pulled out of the right-angle adapter. This system will prevent the cable from being ripped out of the headphone jack, and if you're using heavy microphone stands, anyone who walks away from the Aviom system with their
Tags: Music, Mods, Technology


